1915 13th April
Anzac Landing Coast Reconnoitred
Birdwood and senior ANZAC officers inspect the Gallipoli coast from HMS Queen Elizabeth before the landings.
First World War · Gallipoli · permanent subject timeline
The Allied amphibious landings at Cape Helles and Anzac. This page combines historical context with 34 matching records drawn directly from the World History Database Gallipoli archive.
Historical context
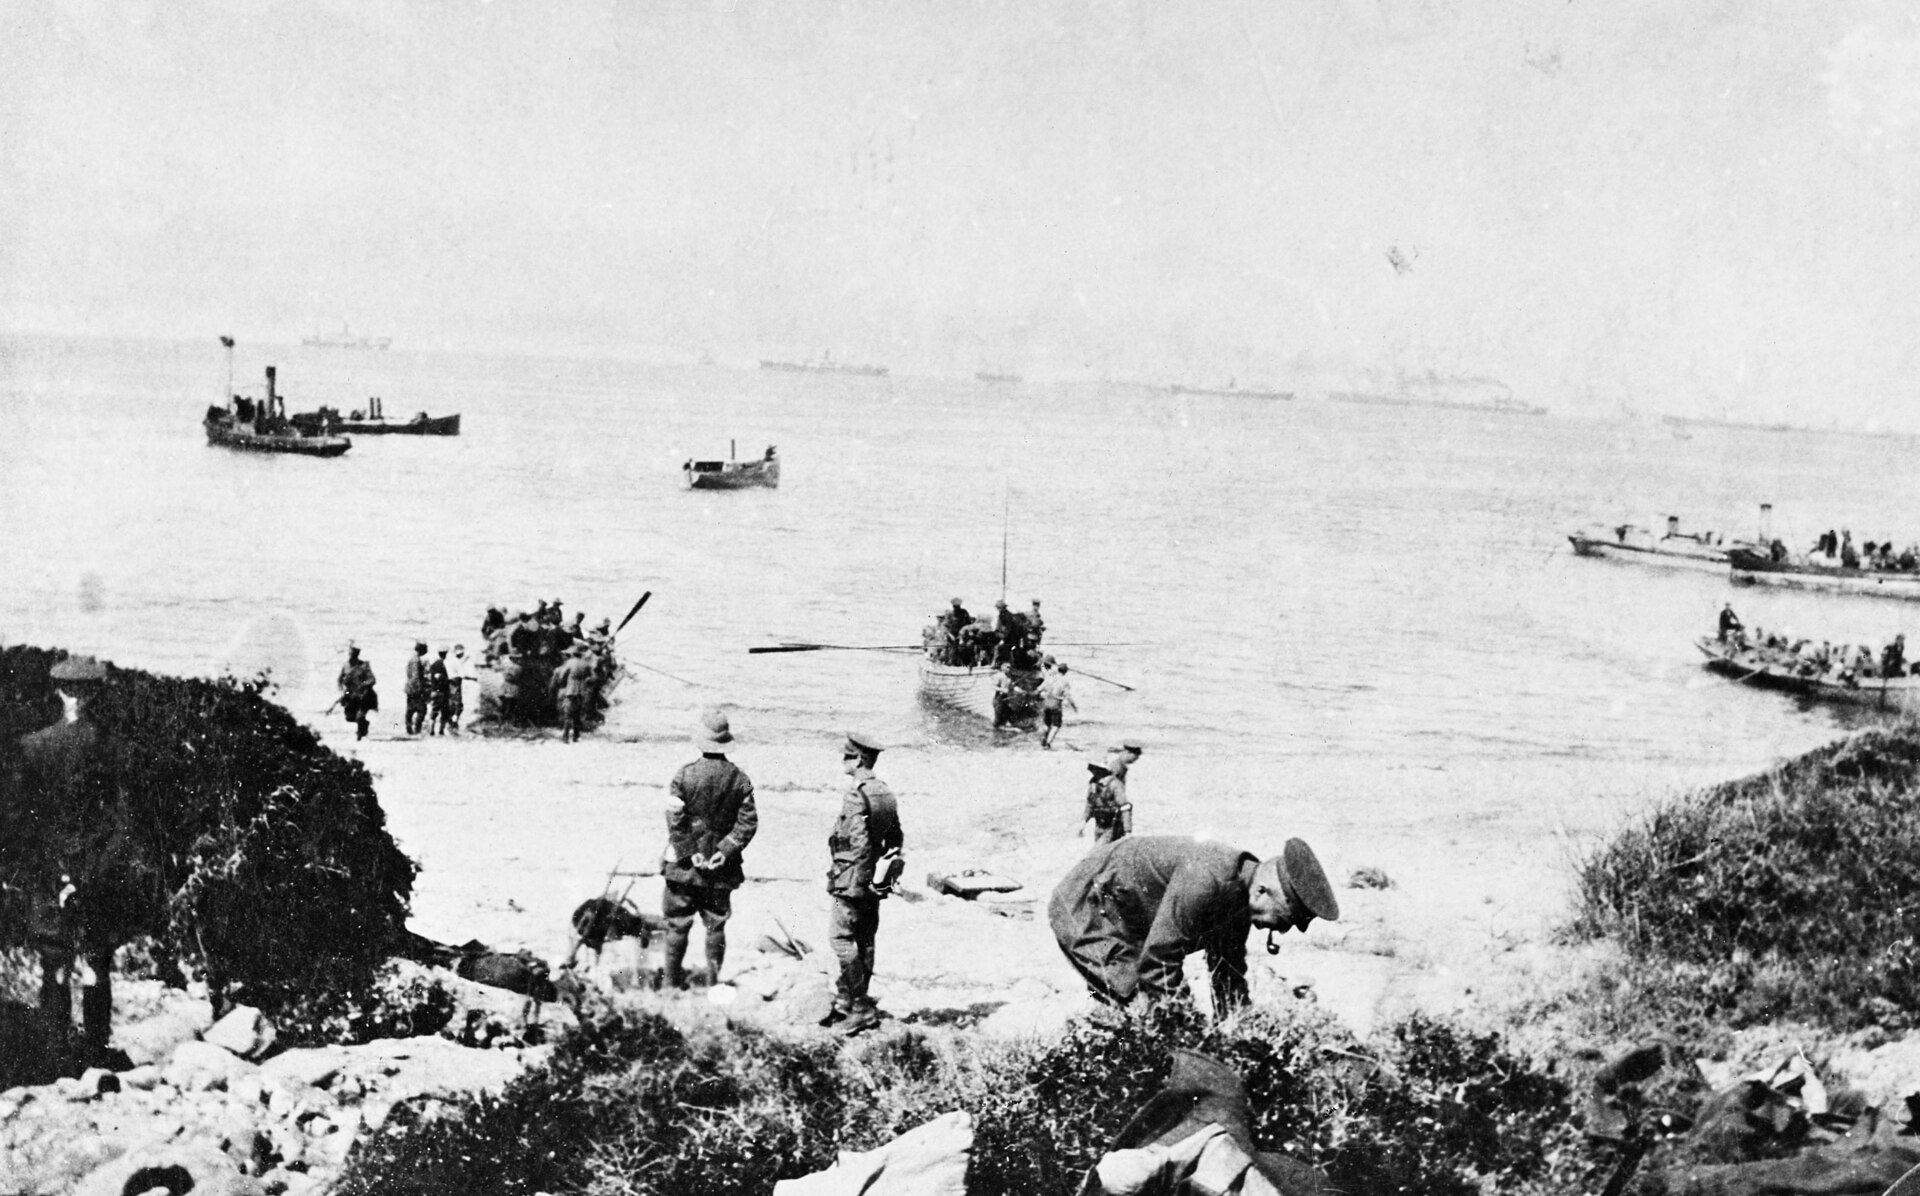
On 25 April 1915 Allied troops landed at several points on the Gallipoli peninsula. British forces attacked around Cape Helles while Australian and New Zealand troops came ashore north of Gaba Tepe at what became Anzac Cove.
The landings established beachheads but did not secure the commanding ridges. The failure to break inland quickly turned the campaign into a prolonged struggle of trenches, reinforcement and attrition.
World History Database records
The records below are selected from the 319-record Gallipoli archive and rendered as static HTML in chronological order.
Anzac Landing Coast Reconnoitred
Birdwood and senior ANZAC officers inspect the Gallipoli coast from HMS Queen Elizabeth before the landings.
Australian Division Landing Orders Issued
Bridges issues final instructions for the 1st Australian Division's role in the ANZAC landing.
Covering Force Embarks for Anzac
Sinclair-MacLagan's 3rd Australian Brigade embarks as the covering force for the ANZAC landing.
AE2 Dardanelles Passage Begun
Stoker takes submarine AE2 into the defended Dardanelles on the morning of the Allied landings.
Anzac Evacuation Rejected after Landing
Hamilton orders the Anzacs to hold their ground rather than abandon the beachhead on the first night.
Battle of ANZAC Cove
Commands the resistence to Allied landings at "Anzac Cove" near Gaba Tepe
Battle of Gallipoli
Commands the 1st troop landings on Gallipoli with the 29th Div & Australian & NZ corps
Cape Helles Landings Launched
Hamilton launches the main British landings on five beaches around Cape Helles.
Fifty-Seventh Regiment Sent toward Chunuk Bair
Mustafa Kemal sends the 57th Regiment toward the heights after learning of the ANZAC landing.
Invasion Convoys Escorted to Gallipoli
De Robeck provides naval escort, bombardment and landing craft support for the invasion.
Second Brigade Diverted to Right Flank
McCay's brigade is diverted toward the southern flank as the landing plan breaks down.
Third Corps Responds to Multiple Landings
Esat directs Ottoman reserves as Allied troops land at Helles and Anzac.
X Beach Landing Secured
Hunter-Weston's troops secure X Beach and begin expanding the northern side of the Helles perimeter.
Helles Beachheads Joined
Hunter-Weston consolidates several Helles landing beaches into a continuous Allied foothold.
Anzac Corps Assigned Gaba Tepe Sector
Birdwood's corps is assigned a landing north of Gaba Tepe to threaten the peninsula's central communications.
Cape Helles Defence Prepared
Halil Sami prepares the 9th Division to defend the southern peninsula and landing beaches.
Helles Five-Beach Assault Planned
Hunter-Weston prepares simultaneous landings at five beaches around Cape Helles.
New Zealand Infantry Brigade Concentrated at Anzac
Johnston concentrates the New Zealand Infantry Brigade after its units complete the landing.
Suvla Outline Scheme Given to Stopford
Hamilton briefs Stopford on the proposed Suvla landing and the need to seize the Tekke Tepe and Kiretch Tepe high ground.
Suvla Landing Added to August Plan
Hamilton adds a new landing at Suvla to support the planned breakout from Anzac.
Lala Baba Captured during Night Landing
Troops of Hammersley's 11th Division seize Lala Baba after sharp fighting during the opening night of the Suvla operation.
Landing Craft Ground inside Suvla Bay
Landing craft carrying parts of the 34th Brigade ground offshore, forcing troops to wade and adding confusion to the night landing.
Sealed Suvla Landing Orders Opened
Priestman's battalion opens sealed orders and studies its assigned objectives shortly before embarking for the night landing.
Suvla Flotilla Departs Imbros
Ferrers-Guy sails with the landing flotilla from Imbros toward Suvla after darkness falls.
Suvla Landing Force Put Ashore
Stopford's IX Corps begins landing at Suvla Bay as the northern part of Hamilton's August offensive.
Ottoman Ninth Division Alerted to Suvla Landing
Kannengiesser receives warning that Allied troops have landed north of Ari Burnu and moves to assess the Suvla threat.
Suvla Inland Advance Delayed
Stopford fails to press rapidly inland after the largely unopposed landing, allowing Ottoman reinforcements to occupy the heights.
Tenth Division Split between Landing Beaches
Hill's 10th Division battalions are divided between C Beach and Gazi Baba, complicating concentration of the Irish division.
East Anglian Division Begins Suvla Landing
The first units of Inglefield's 54th East Anglian Division land at Suvla to reinforce IX Corps.
Stopford Removed from Suvla Command
Hamilton removes Stopford after the Suvla force fails to exploit the surprise achieved by the landing.
Second Mounted Division Lands at Suvla
Peyton's dismounted 2nd Mounted Division completes its arrival at Suvla after landing during the night of 17 to 18 August.
August Breakout Plan Approved
Hamilton approves a major August offensive combining ANZAC attacks, a Sari Bair advance and new landings at Suvla.
Gallipoli Defence System Reorganised
Liman von Sanders redistributes Ottoman formations and prepares mobile reserves against expected Allied landings.
Gallipoli Landing Plan Developed
Hamilton develops simultaneous landings at Cape Helles and north of Gaba Tepe with a French diversion at Kum Kale.
Editorial provenance
Compiled and edited by World History Database.
Historical context is editorial material; the chronology is generated from World History Database Gallipoli and Dardanelles records.
Last reviewed: September 2026.
Continue exploring